This document describes how to install the IFS integration to Planning and Scheduling Optimization (PSO).
When the necessary IFS components and PSO components are installed, this guide describes how to configure the two system to work together.
Note
1: Please note that many of the system settings are already inserted into the system. However, in some cases, these setting needs to be verified and/or modified. This guideline is also useful for troubleshooting scenarios.
Note 2 : 360 Scheduling is renamed to Planning and
Scheduling Optimization (PSO), and therefore some artifacts containing the string 360 still
occur in this documentation.
Verify the PSO_RESPONSE asynchronous queue for hosting all the inbound messages coming from PSO. Type of message can be file or http. The configuration screen should look as displayed below in Solution Manager/Integration/IFS Connect/Setup IFS Connect:
Verify the PSO_REQUEST asynchronous queue for hosting all the outbound messages. Type of message can be file or http. The configuration screen should look as displayed below in Solution Manager/Integration/IFS Connect/Setup IFS Connect:
Validate the already existing file reader. This is done in Solution Manager/Integration/IFS Connect/Setup IFS Connect:
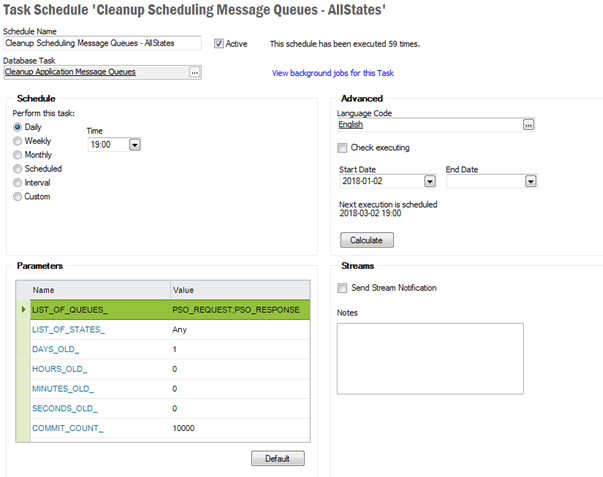
Create clean up task in Solution Manager/Background Processing/Scheduled Tasks/Scheduled Database Task for PSO_RESPONSE and PSO_REQUEST queues.
Note: Set proper values in the Parameters section on usage. This is to avoid too large tablespaces storing old messages.
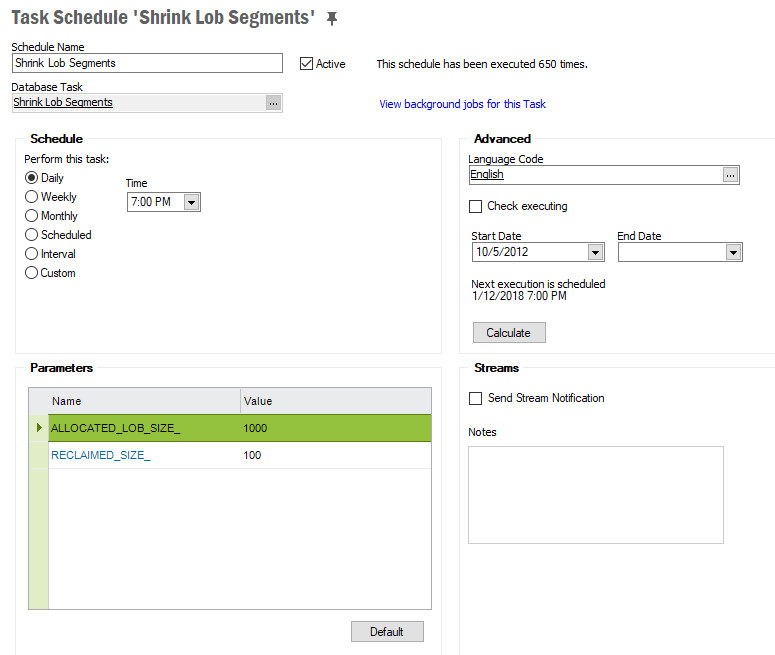
To reduce the tablespace size, it is important to activate the background job SHRINK LOB SEGMENTS to run at least once a week. This is defined in My Administration/Scheduled Tasks/Schedule Database Tasks.
Note: If you have your LOB segments stored in secured files, this functionlaity is only supported if running Enterprise Edition of the Oracle database.
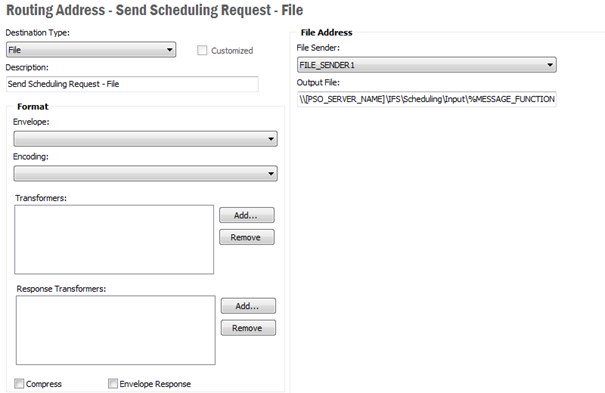
Add an outbound routing rule for sending file messages to PSO in Solution Manager/Integration/IFS Connect/Routing Address. Output file must be updated to the correct server name and path for PSO Input Manager Service (IMS).
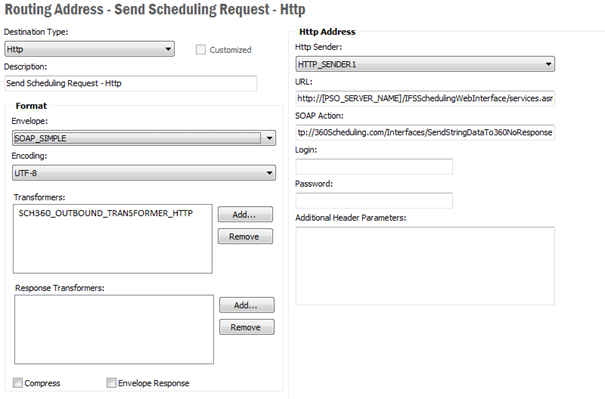
Add an outbound routing rule for sending http messages to PSO in Solution Manager/Integration/IFS Connect/Routing Address. URL address must be updated to the correct http address to the PSO web service interface server.
Verify the existing inbound routing address rule for receiving file messages from PSO for scheduling messages. The configuration screen should look like this in Solution Manager/Integration/IFS Connect/Routing Address:
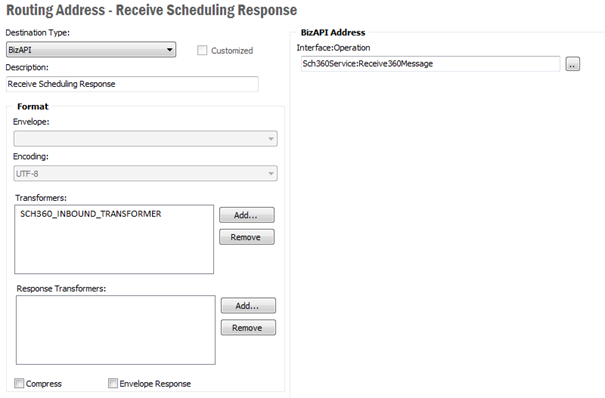
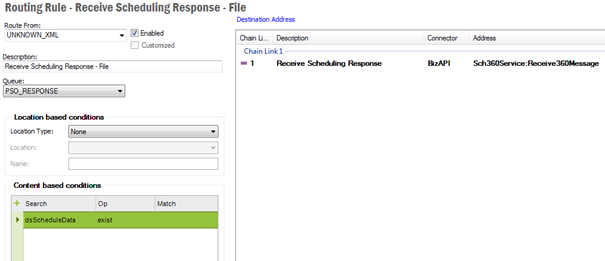
Verify the existing inbound routing rule for receiving file messages from PSO for scheduling messages. The configuration screen should look like this in Solution Manager/Integration/IFS Connect/Routing Rules:
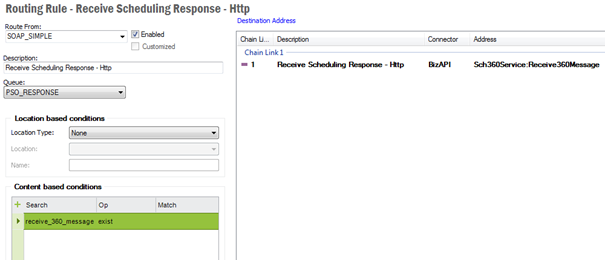
Verify the existing inbound routing rule for receiving HTTP messages from PSO for scheduling messages. The configuration screen should look like this in Solution Manager/Integration/IFS Connect/Routing Rules:
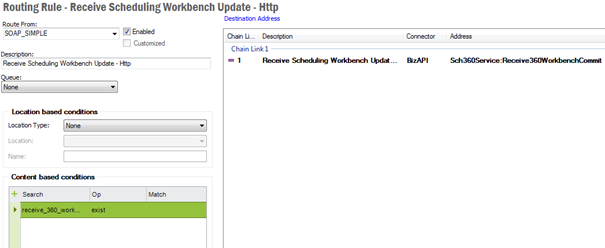
Verify the existing inbound routing rule for receiving HTTP messages from PSO for workbench commit. The configuration screen should look like this in Solution Manager/Integration/IFS Connect/Routing Rules:
Verify the existing outbound routing rule for sending scheduling file messages to PSO. The configuration screen should look like this in Solution Manager/Integration/IFS Connect/Routing Rules:
.png)
Verify the already existing outbound http routing rule for sending http messages to PSO. The configuration screen should look like this in Solution Manager/Integration/IFS Connect/Routing Rules:
.png)
Verify the existing inbound transformer for transforming PSO XML to IFS XML. The configuration screen should look like this in Solution Manager/Integration/IFS Connect/Setup IFS Connect:
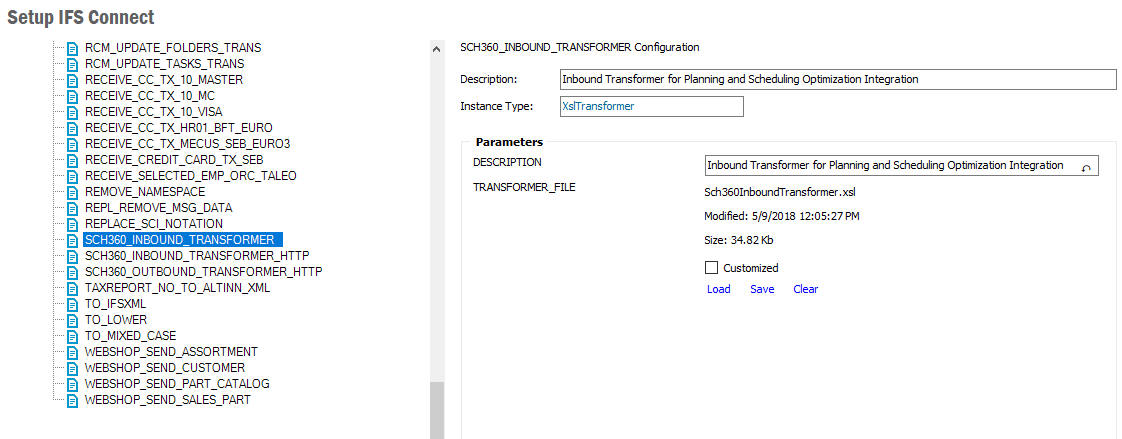
Verify the existing inbound transformer for transforming PSO XML to IFS XML. The configuration screen should look like this in Solution Manager/Integration/IFS Connect/Setup IFS Connect:
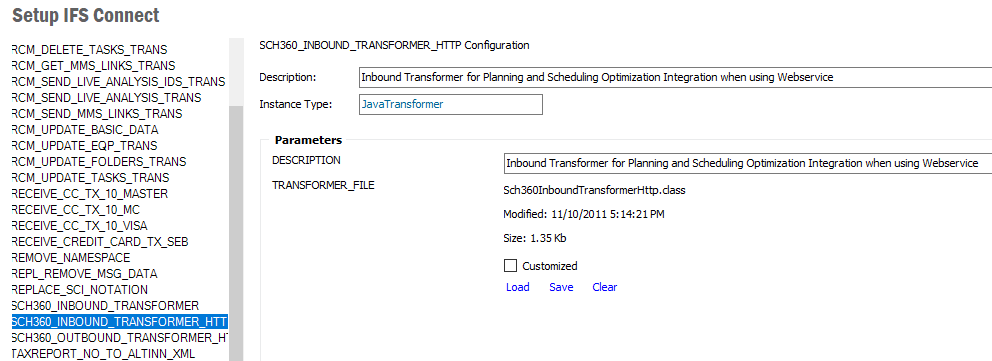
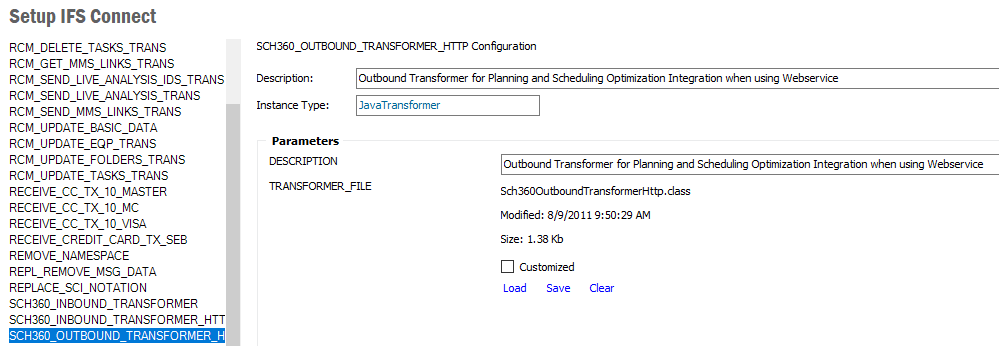
Verify the already existing outbound HTTP transformer for transforming IFS XML to PSO XML. The configuration screen should look like this in Solution Manager/Integration/IFS Connect/Setup IFS Connect:
Please refer to the section BDR for PSO
in IFS Applications Online Documentation. The
activity to be used is Define Broadcast.
Note: Please note that you have to set up the basic data requirements for this activity.
Please refer to the section BDR for PSO
in IFS Applications Online Documentation. The
activity to be used is Define Dataset.
Note: Please note that you have to set up the basic data requirements for this activity.
When utilizing Receive Scheduling Request - HTTP routing rule, a specific system user must be
created in IFS Applications to handle HTTP requests. This user must have access
to the permission set SCH360_WEBSERVICE.
Note: This user must also exist as a Company User and Site User for the sites used for the integration.
Please refer to the section BDR for PSO
in IFS Applications Online Documentation. The
activity to be used is Set up a Scheduled Task for
transferring data to PSO.
Note: Please note that you have to set up the basic data requirements for this activity.
Please refer to the section BDR for PSO in IFS Applications Online Documentation. The activity to be used is Define Scheduling Configuration.
Note: Please note that you have to set up the basic data requirements for this activity.
The PSO software when used by the IFS integration is set up in a specific
way. The following configurations need to be imported into PSO:
• IFS Language
(Language Files/MessageTexts-en-IFS.xml)
• IFS Parameters
(Setup Files/IFS APP10 Configuration.xml)
For information on how to import the configuration files, please refer to the
PSO Installation Guide.
In PSO, permission groups defines which users that are allowed to see a set of resources (IFS Employees) and activities (IFS Work Orders). These permission groups are called object groups. In the integration, object groups has the equivalence of IFS Sites. This means that in order for an PSO user to be able to see information like resources and activities belonging to a particular site, the user must be connected to the corresponding object group in PSO. Object groups for activities and resources are automatically transferred from IFS to PSO but object groups for the PSO users must be set up and granted to the PSO users manually from the PSO SWB. The usage of object groups can be controlled with the parameter Object Group Filter in Scheduling Configuration (see Step 7 above).
To optimize the PSO travel calculations, please install PSO Hierarchical Travel Matrix (HTM) for the preferred geographical area. For information on how to install the PSO Hierarchical Travel Matrix (HTM), please refer to document PSO Installation Guide.
Use the following logging tools for tracking down a possible problem in the integration: